Quick Guide to setting up (an undated) service
Access:
Menu Administrator
Creating categories
Creating items
Creating items
Service Administrator
Creating the service icon
Linking categories to the service
Hiding/disabling the service
Linking categories to the service
Hiding/disabling the service
Schools and Organisations can set up registrations and permission forms, tickets to events, merchandise sales and payments easily, using the set up described in this guide.

Food days have a slightly different set-up, so please refer to our Quick guide for setting up food days, for specific information on food services.
If you are selling items that have a limited quantity (e.g. tickets to events) please read our Quick Guide to Ticket Sales using the Stock Function.
Uniform items can be managed in two different ways, and more information on this set up can be found Quick Guide for Uniform Listings.
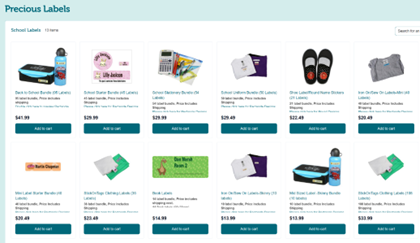
For your caregivers, your Kindo Shop will look something like this:
Users will see the service icon and name on the home page, e.g. Movie. Under this are the categories you have added, e.g. Movie Tickets. If they click on Movie, all the categories and items you have set up under that service will display.
You can enter as
much information as you need, including a summary (which appears
directly under the item name – see left) and a description (which will
appear when the user clicks on the item name or information icon – see below).
The user can add an item to their cart by clicking on add to cart,
selecting the child for whom the order is for and completing the online
registration form (optional) that you set up.
If you have added
some Choices and Options, the user will be asked to make these selections
before adding the item to their cart.
Users are not able
to pay and register until they have answered all the questions you set as compulsory.
Once the form is
filled, the item will be added to their cart, and they can Checkout or shop for
further items.
You can check for sales
daily or at the close of the sales period. There are a number of reporting
options available which will show you answers to the form questions and the
options and choices selected, e.g., Download excel / CSV.
For more detailed
information on reporting options, view the Reporting Manual for Order Status.
Key Reports
School purchase report is an excel
report which will sort orders into class lists, with each class being on a new
tab in the excel workbook.

NOTE: does not show
options or choices so best used when each item is an individual listing.
- Label list is a PDF which will
print the list in Room number order and will show options and choices.
- Print to A4 Label (8 per page) is
a PDF for use on an A4 label sheet. Will show allergy information for food
suppliers only, options and choices. Sorted in room number order.
- Print to Dymo label writer for
use with a Dymo 450 label writer. Will
print labels based on consignment. Shows options and choices. (No longer widely available, please contact us to discuss).
- Production list will give you total
numbers of the items ordered and will show allergy alert information for food
suppliers only.
Creating the listing
(Menu Administrator)
All set up is done on our partner website: https://partner.kindo.co.nz.

TIP: Bookmark this page for quick and
easy access.
1. On the partner site, select ‘item
editor’ and check you are operating as the correct supplier.
You can add a Service Administrator and Menu & Order Administrator. Go to our section on our Knowledge Base about roles.
You can add a Service Administrator and Menu & Order Administrator. Go to our section on our Knowledge Base about roles.
2. You can select an existing category and
add new items or create a new category. Select ‘add new’.
3. Add
your new category name to the
pop-up box, e.g., Movie Tickets.
The category name can be the same name as the service.
Untick ‘Has daily order cutoff’ (that function is only for dated
food services).
4. Select done.
5. Select Add new item.
Start
entering the information for your items, each step is numbered in the picture above.
6. Enter the name of your
item, e.g., Ticket for Friday. This is a compulsory field.
7. Enter
the price. This is a compulsory field.
8. Enter
the GL Code (General Ledger code), this won’t be visible to users
but will be visible on your internal reports.
This is optional, but each different
ledger will be separated out on your reports so is recommended.
9. If you
need to, add any other details you need for your reports into the Remarks field. This also won’t be visible to your users but will be visible on your
internal reports. This is optional.
10. Add an image.
Clicking here will bring up the image upload box. You can click to select an
image you have on your computer, or you can drag and drop an image into the
upload box.

You can add jpg, jpeg, bmp, gif & png files but they must
be under 5MB.
11. Ensure
that the item is Avail. Every day - available for purchase every day
(click to change if not).
12. Enter important
information in the Click to add summary field. This information will show up under the name of the item on the screen for your
families.
Information can be copied and pasted from other documents, you can include
links to websites, and you can format the appearance of the information – Bold,
italics, bullet points.
13. If
there is more information you’d like to add, enter it in the Click to add
description field. Users
will see this information if they click anywhere inside the item’s box.
Information
can be copied and pasted from other documents, you can include links to websites,
and you can format the appearance of the information – Bold, italics, bullet
points.
TIP: if using the description field, add the words “click here
for more information” somewhere in the add summary field, so users know to
access the additional information.
14. If you want anything to be printed onto
the electronic receipt that gets sent, enter it in Detail to print on electronic
receipt.
15. If you
have a limited number of items, e.g., tickets to sell, select the pencil
icon next to Available Quantity: unlimited to update the stock numbers. In
Limited Stock you can type in the stock number. If you have no stock enter ‘0’
in this field.
On the shop site, the caregivers will see ‘Sold Out’
notification. Note: Stock Numbers
can be edited at any time, it is the responsibility of the supplier to check
stock and maintain stock levels.
16. Add any
Choices here, choices are for when the user can only select one, e.g., Size of
uniform.
TIP: Some reporting options (like
school purchase report) will not show options or choices. Alternatively, you can list each
item individually. E.g. instead of an
option for an additional can of drink, this could be an individual item.
17. Add any Options here. Options are used when the user can choose more than one of the options and/or they come at an additional price, e.g., select a drink for an additional $1, users can have more than one can. The default setting for option price is $0. If you would like to add a charge, click on Has priced options and fill out the fields. If no price is added in this field, the user will be able to add all the options without any cost to them.
It is not possible to use stock function AND choices/options for
the same item, as the stock function is counting down stock for the item itself
not the choices included with it. E.g. Uniform Polo Shirt Item - stock will
countdown this item as a whole, not the sizes listed as choices. If you
would like to use the stock function, create separate items for each choice.
18. Create
your permission form by entering questions or statements that the customer
needs to answer under Form Questions.
Question
ID - this is for your reference
only. It will print on your internal reports but will not be seen by the
customer.
Question - enter your question or statement here, this is what the
customer will respond to.
Answer - select the type of answer you require from the dropdown
menu. Choose between Yes/No, Text (the customer writes in their answers).
Compulsory - tick this ON if the customer must answer the question
before continuing.
You can change the order of your questions by using the grab
handles to the left of each question and dragging up or down.
19. Select
the tick next to the price when you are happy with the details, to close the editing
options.
20. To create another item similar to the one you have just created, e.g. Entry ticket with goodie bag, select Duplicate Item to create a copy.
21. Edit the name, price, and any other
details for the new listing. All details will be copied from the original
listing to the new one, except item image and available quantity.
You cannot have Items with identical name. You will see a warning if this
is the case.
22. You can
change the order of your items by clicking on the handle and dragging the item
to its new position.
23. Once
you have created listings for all your items, select Save & Publish.
TIP: This will not be visible to parents until we add it to a
service.
Creating the home
page service icon
(Service Administrator)
All set up is done on our partner website: https://partner.kindo.co.nz
TIP: Bookmark this page for quick and easy access.
1. On the partner site, select service manager.
2. Click on Add new.
3. Enter the Service Name (if not
already set up or adding to an existing Service) in the pop-up box, e.g. Movie and click done.
4. The choose icon pop-up box will appear. Choose one of
our icons by clicking on it, or click on the upload new icon button to upload your own picture. You can
select a file from your computer, or you can drag and drop an image into the
upload file option.
NOTE: if you are
uploading your own picture, it must be a jpg or jpeg file and less than 5MB.
5. The add/remove categories pop-up
box will appear. Choose the Supplier
and then select the Categories. e.g. Movie
Tickets that you created earlier.
6. Under Availability set the dates for your service. The
service “closes” at midnight on the last day of the service. Tickets to our Movie
will be available from Mon 20 November 2023 to Wed 20 December 2023.
Always open (5
Years), means the service is continually open with no closing date, and so
will remain available to your users, until such a time as you disable (hide)
the service, or set dates.
7. Click Save & Publish at the top of the page to make your items visible on your
shop site (or Save Draft to save your work, but not yet make
visible to families).
8. Finally, click generate shareable link (see
above). This will bring up a window where you can copy a special link that will
take families straight to this service once it’s published.
Use this link in any electronic document, newsletter, or webpage where the Movie is mentioned or
advertised to make it easy for families to buy tickets.
Add external affiliate suppliers
At Kindo, we
have a range of different affiliated suppliers that can be added to your shop.
Select
your affiliate supplier & let us know. We will set it up for you. (Available suppliers can be
found on our website, or we can work with you if you have one you would
like to use.)
Families purchase through myKindo. Affiliate supplier delivers to school, labelled and
ready to distribute. (Home delivery also available in some cases.)
Invoice the affiliate supplier. (Kindo reports will
tell you how much to invoice.)
Hiding the home
page service icon
(Service Administrator)
Hiding the Service when the Movie is finished, or
if you are not yet ready for it to be visible to your users, means your Kindo
shop doesn’t become too cluttered and stays relevant.
1. Go into the
service and tick the disabled button. This will hide the service. Save
& Publish to make changes visible on your shop site.
2. Next year, or next term, when you
want to enable it again, you will find it under Hidden Services. Untick
disabled and it will be enabled. Amend the dates and categories you want included. Then Save & Publish to make it visible on your shop site.
Adding a service to Community Shop
1. If you would like your service to also be visible
in your community shop, go into the service and tick the show in community
shop button.
2. This service
will now be visible in Community Shop.
3. Go to Service
Manager page on Partner. Click on Generate shareable link.
TIP: use the community shop link when advertising events/shop items that could
be accessible to the community and not just your caregivers.
e.g., Movie, Alumni, Trivia night, Show, Performances and much more.
e.g., Movie, Alumni, Trivia night, Show, Performances and much more.
4. Your
community can buy items from your school shop just like any other online shop. They can register using their email address, create a password, select shop
items, complete and purchase items using secure online payment options (Poli,
credit card, Online Eftpos). A great way to help with Fundraising for your school
and to get the whole community involved.
5. For more
information on community shop click here.
Checking Orders
(Order
Administrator)
Viewing
orders and reports is done on our shop (live) website: https://shop.kindo.co.nz.
When you
login to the Shop site, go to the Order Status page, which is where you need to
be to check orders and call up reports.
1. Select the start
and end date as the date of your event and click on Display orders.
2. If there are more than just event orders, use the
filter options under Menu category to select your event only.
3. Click on the
Download or print dropdown box to select the report options.
Need assistance?
Refer to our user
manuals or online support articles for more detailed information or contact our
Helpdesk.
· Email: helpdesk@kindo.co.nz
· Online Support: support.kindo.co.nz
Related Articles
Setting service dates
Access: Service Administrators Setting dates is important for some services - it sets the period of time that the service is open for business. TYPES OF DATE SETTINGS Choose the date settings most appropriate for your service, four ideas below: 1. ...Quick Guide for setting up food days (Dated Service)
Access: Menu Administrator - Creating categories - Creating items Service Administrator - Creating the service on the Kindo Shop home page - Hiding individual items Order Administrator - Checking for orders - Report printing Schools, fundraising ...Service Administrator Guide
Access: Service Administrator The Service Administrator is the person who is responsible for the home page service icons of your school shop and use the Partner site - https://partner.kindo.co.nz. They can: Create new services (icons); Add a welcome ...Quick guide for ezlunch suppliers
Access: Menu Administrators ezlunch Suppliers can set up your food listings using the setup described in this guide, using our new partner pages. Lunch set up would appear to your customers as follows: This article shows you how to create your food ...Quick Guide for non-food suppliers
Access: Menu Administrator - Creating categories - Creating items - Manage Administrators Service Administrator - Creating the service on the Kindo Shop home page - Manage Administrators Order Administrator - Checking for orders - Report printing - ...